Setting Up Service Points
Introduction
Overview
Previously known as retailer set up, service point set up now extends to a broader ranger of locations where beneficiaries can redeem benefits from SCOPE and use these to purchase food or other items. Setting up a service point involves uploading identifying information for the service point to SCOPE and then assigning the service point to a Point of Service (POS) terminal.
Who is responsible for setting up service points?
Procurement and IT are responsible for setting up service points on SCOPE. Check with your Country Office to confirm who in Procurement is responsible for setting up service points in your country.
Why is setting up service points important?
Setting up service points on SCOPE enables WFPWorld Food Programme to begin voucher or in-kind benefit distribution to beneficiaries in regions suited to these modalities. Without this means of accounting for transactions at service points, WFPWorld Food Programme cannot perform these kinds of interventions.
What do I need to do before setting up service points?
Before setting up a service point you will need to confirm that the POS terminal provided to the service point operator has already been registered on SCOPE.
Where can I learn more?
For more information on setting up service points, click here to explore related Digital Assistance Services Academy Learning Channel materials.
Instructions

To set up a service point, log in to your Country Office on SCOPE and perform the following steps:
-
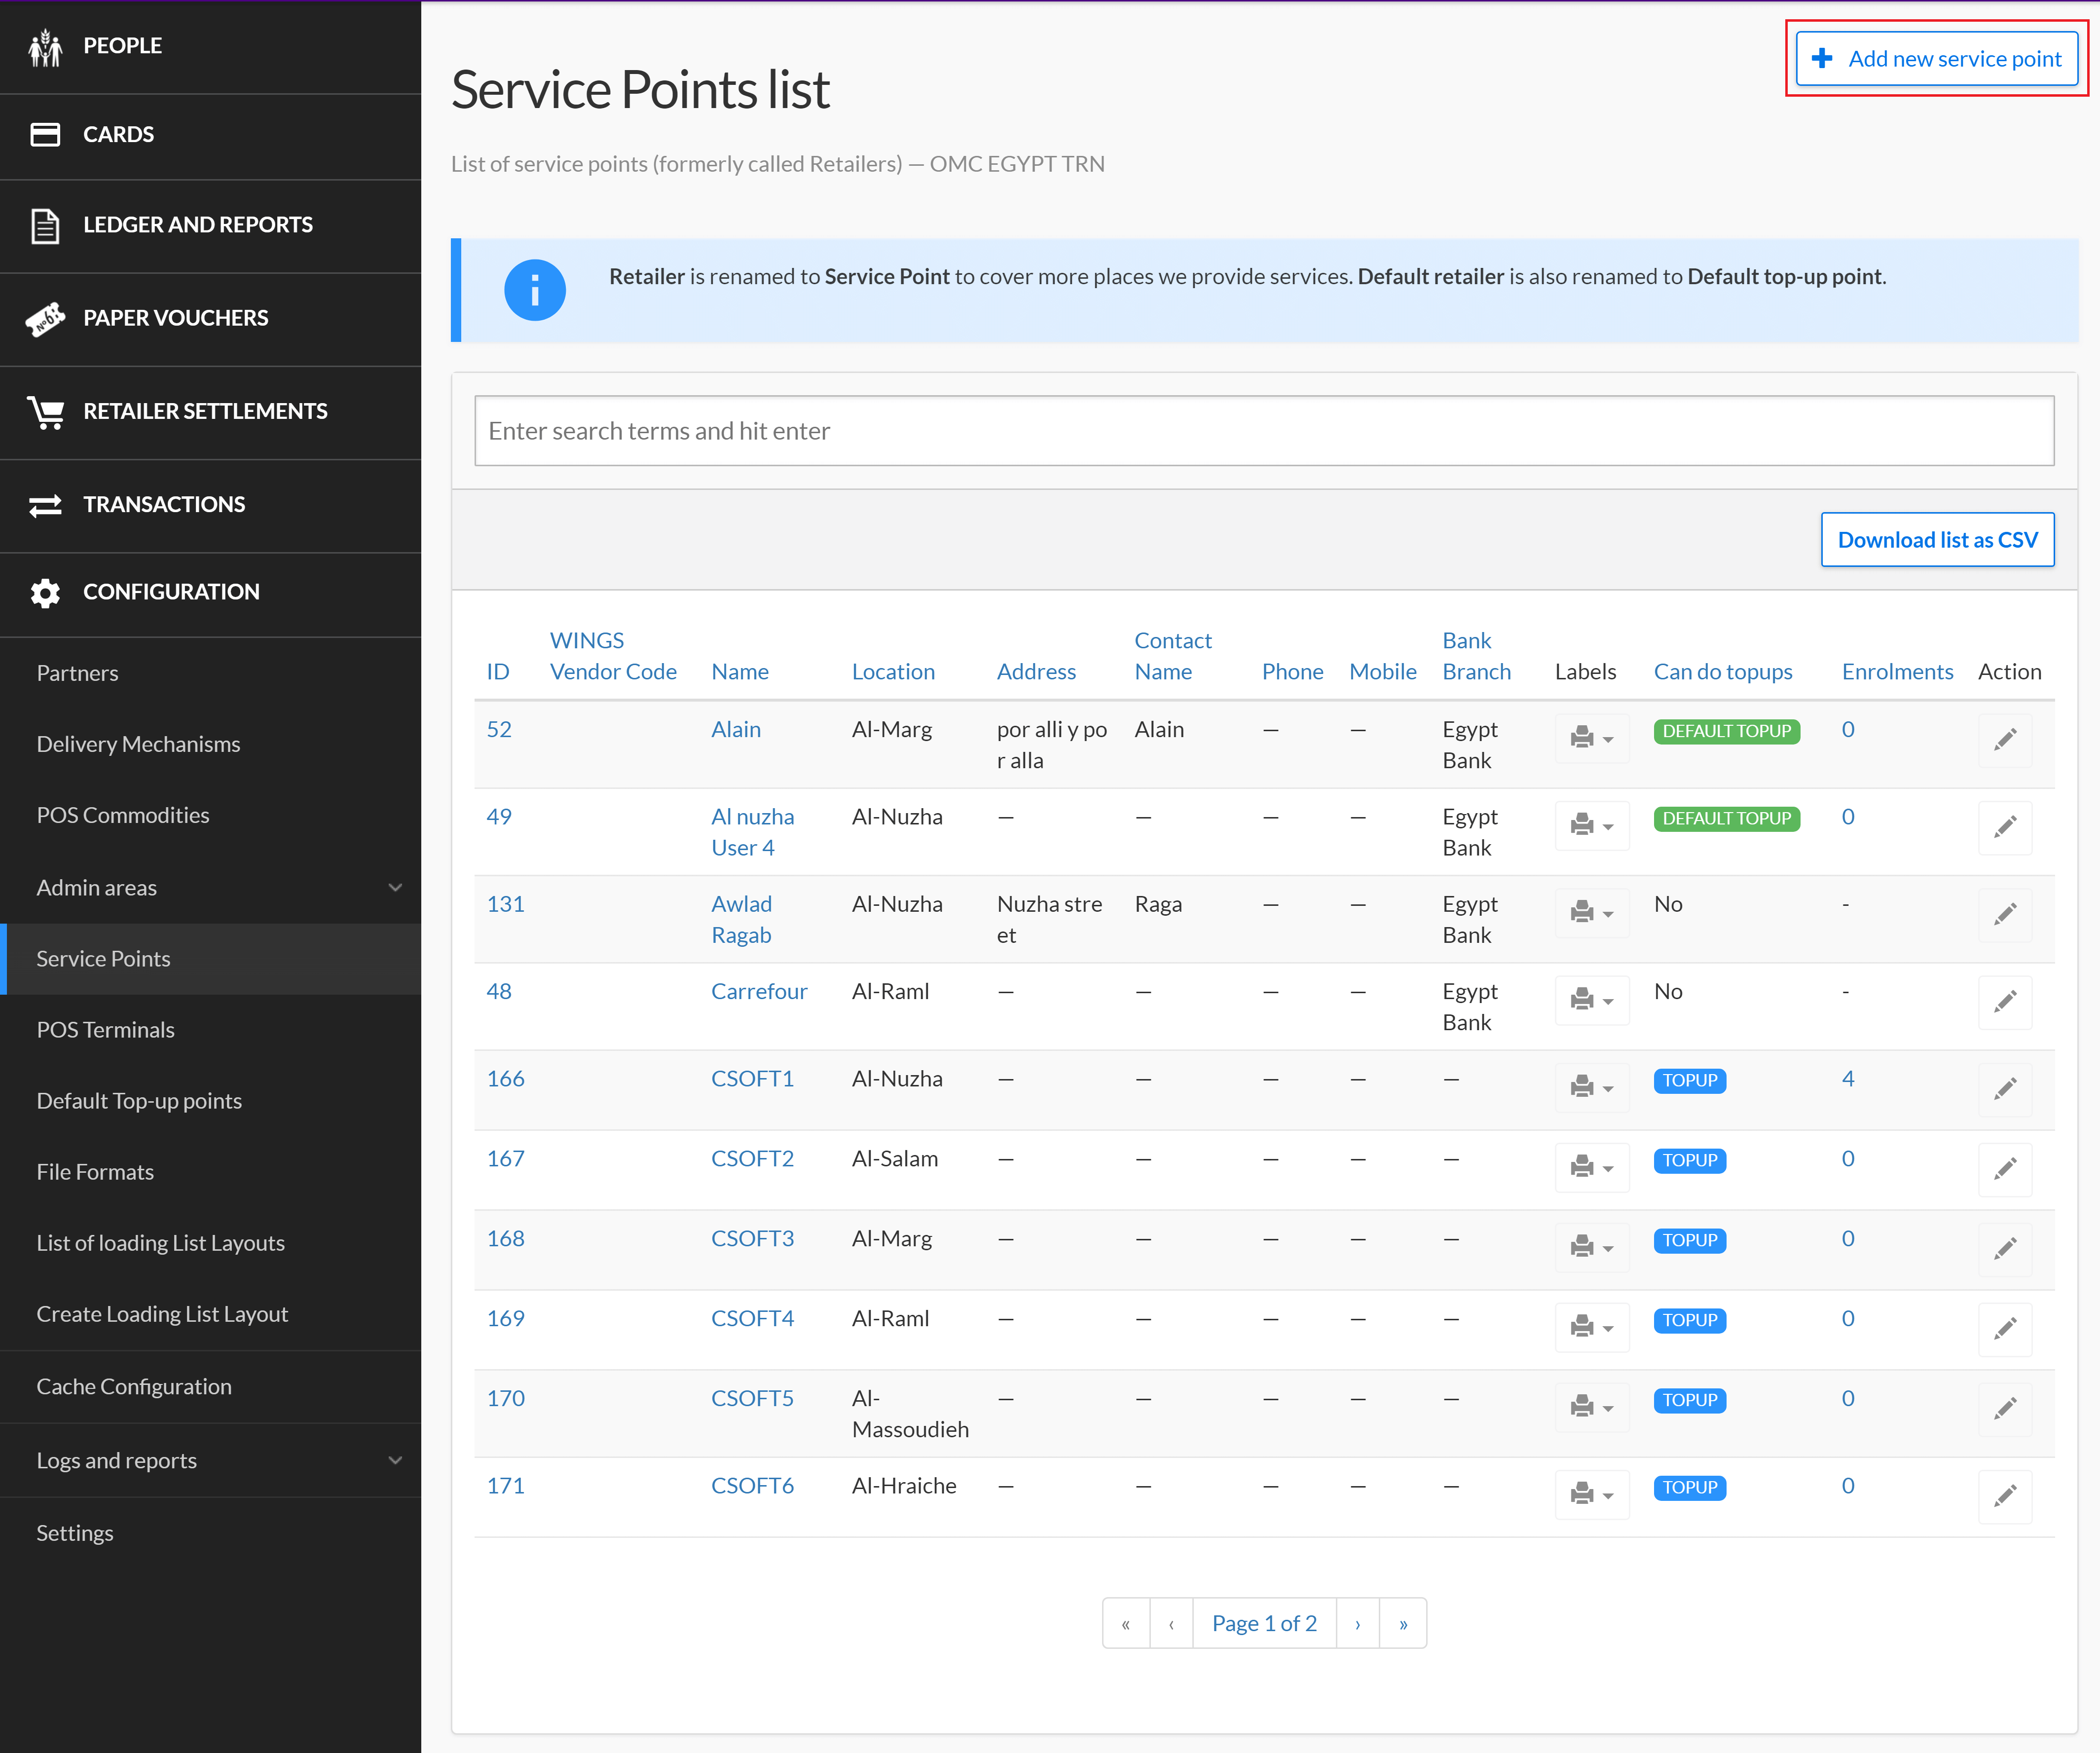
In the Country Office page, click in the menu.

-
In the Service Points list page, click .
-
In the Create new service point page, enter the relevant details for the service point you want to register on SCOPE, then click . Note that the Name and Location fields are required.

-
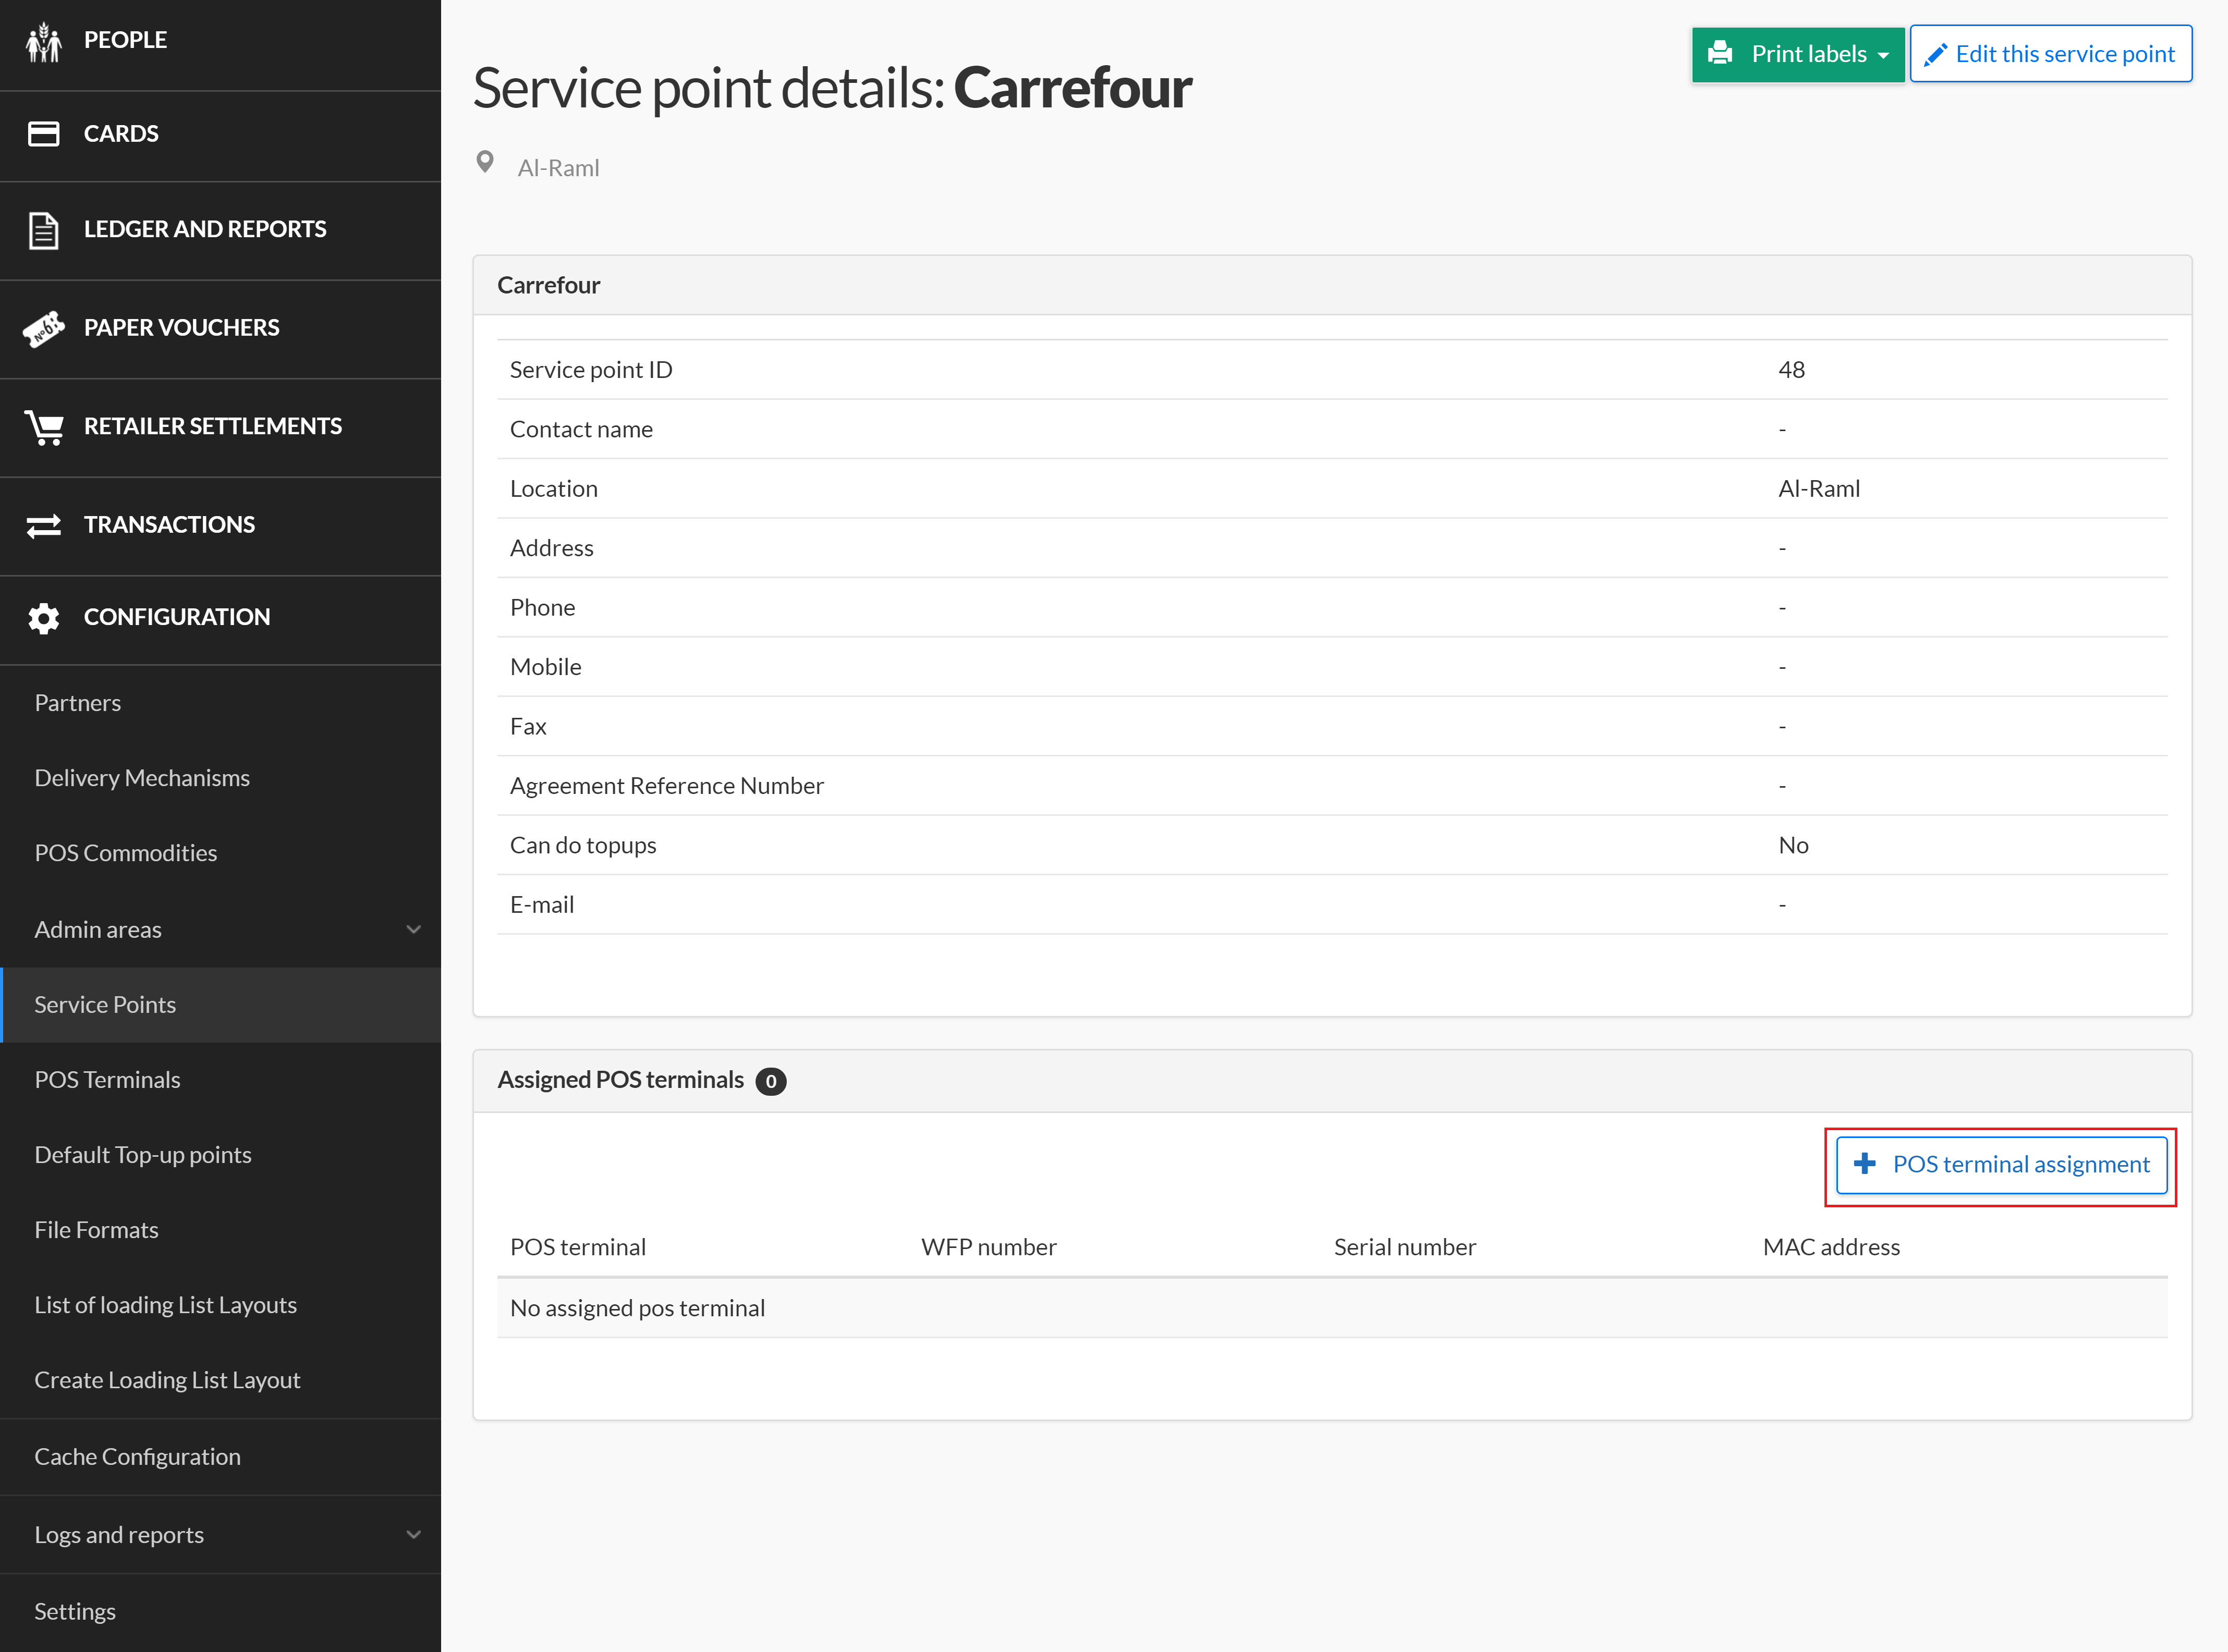
In the Service point details page, click .
-
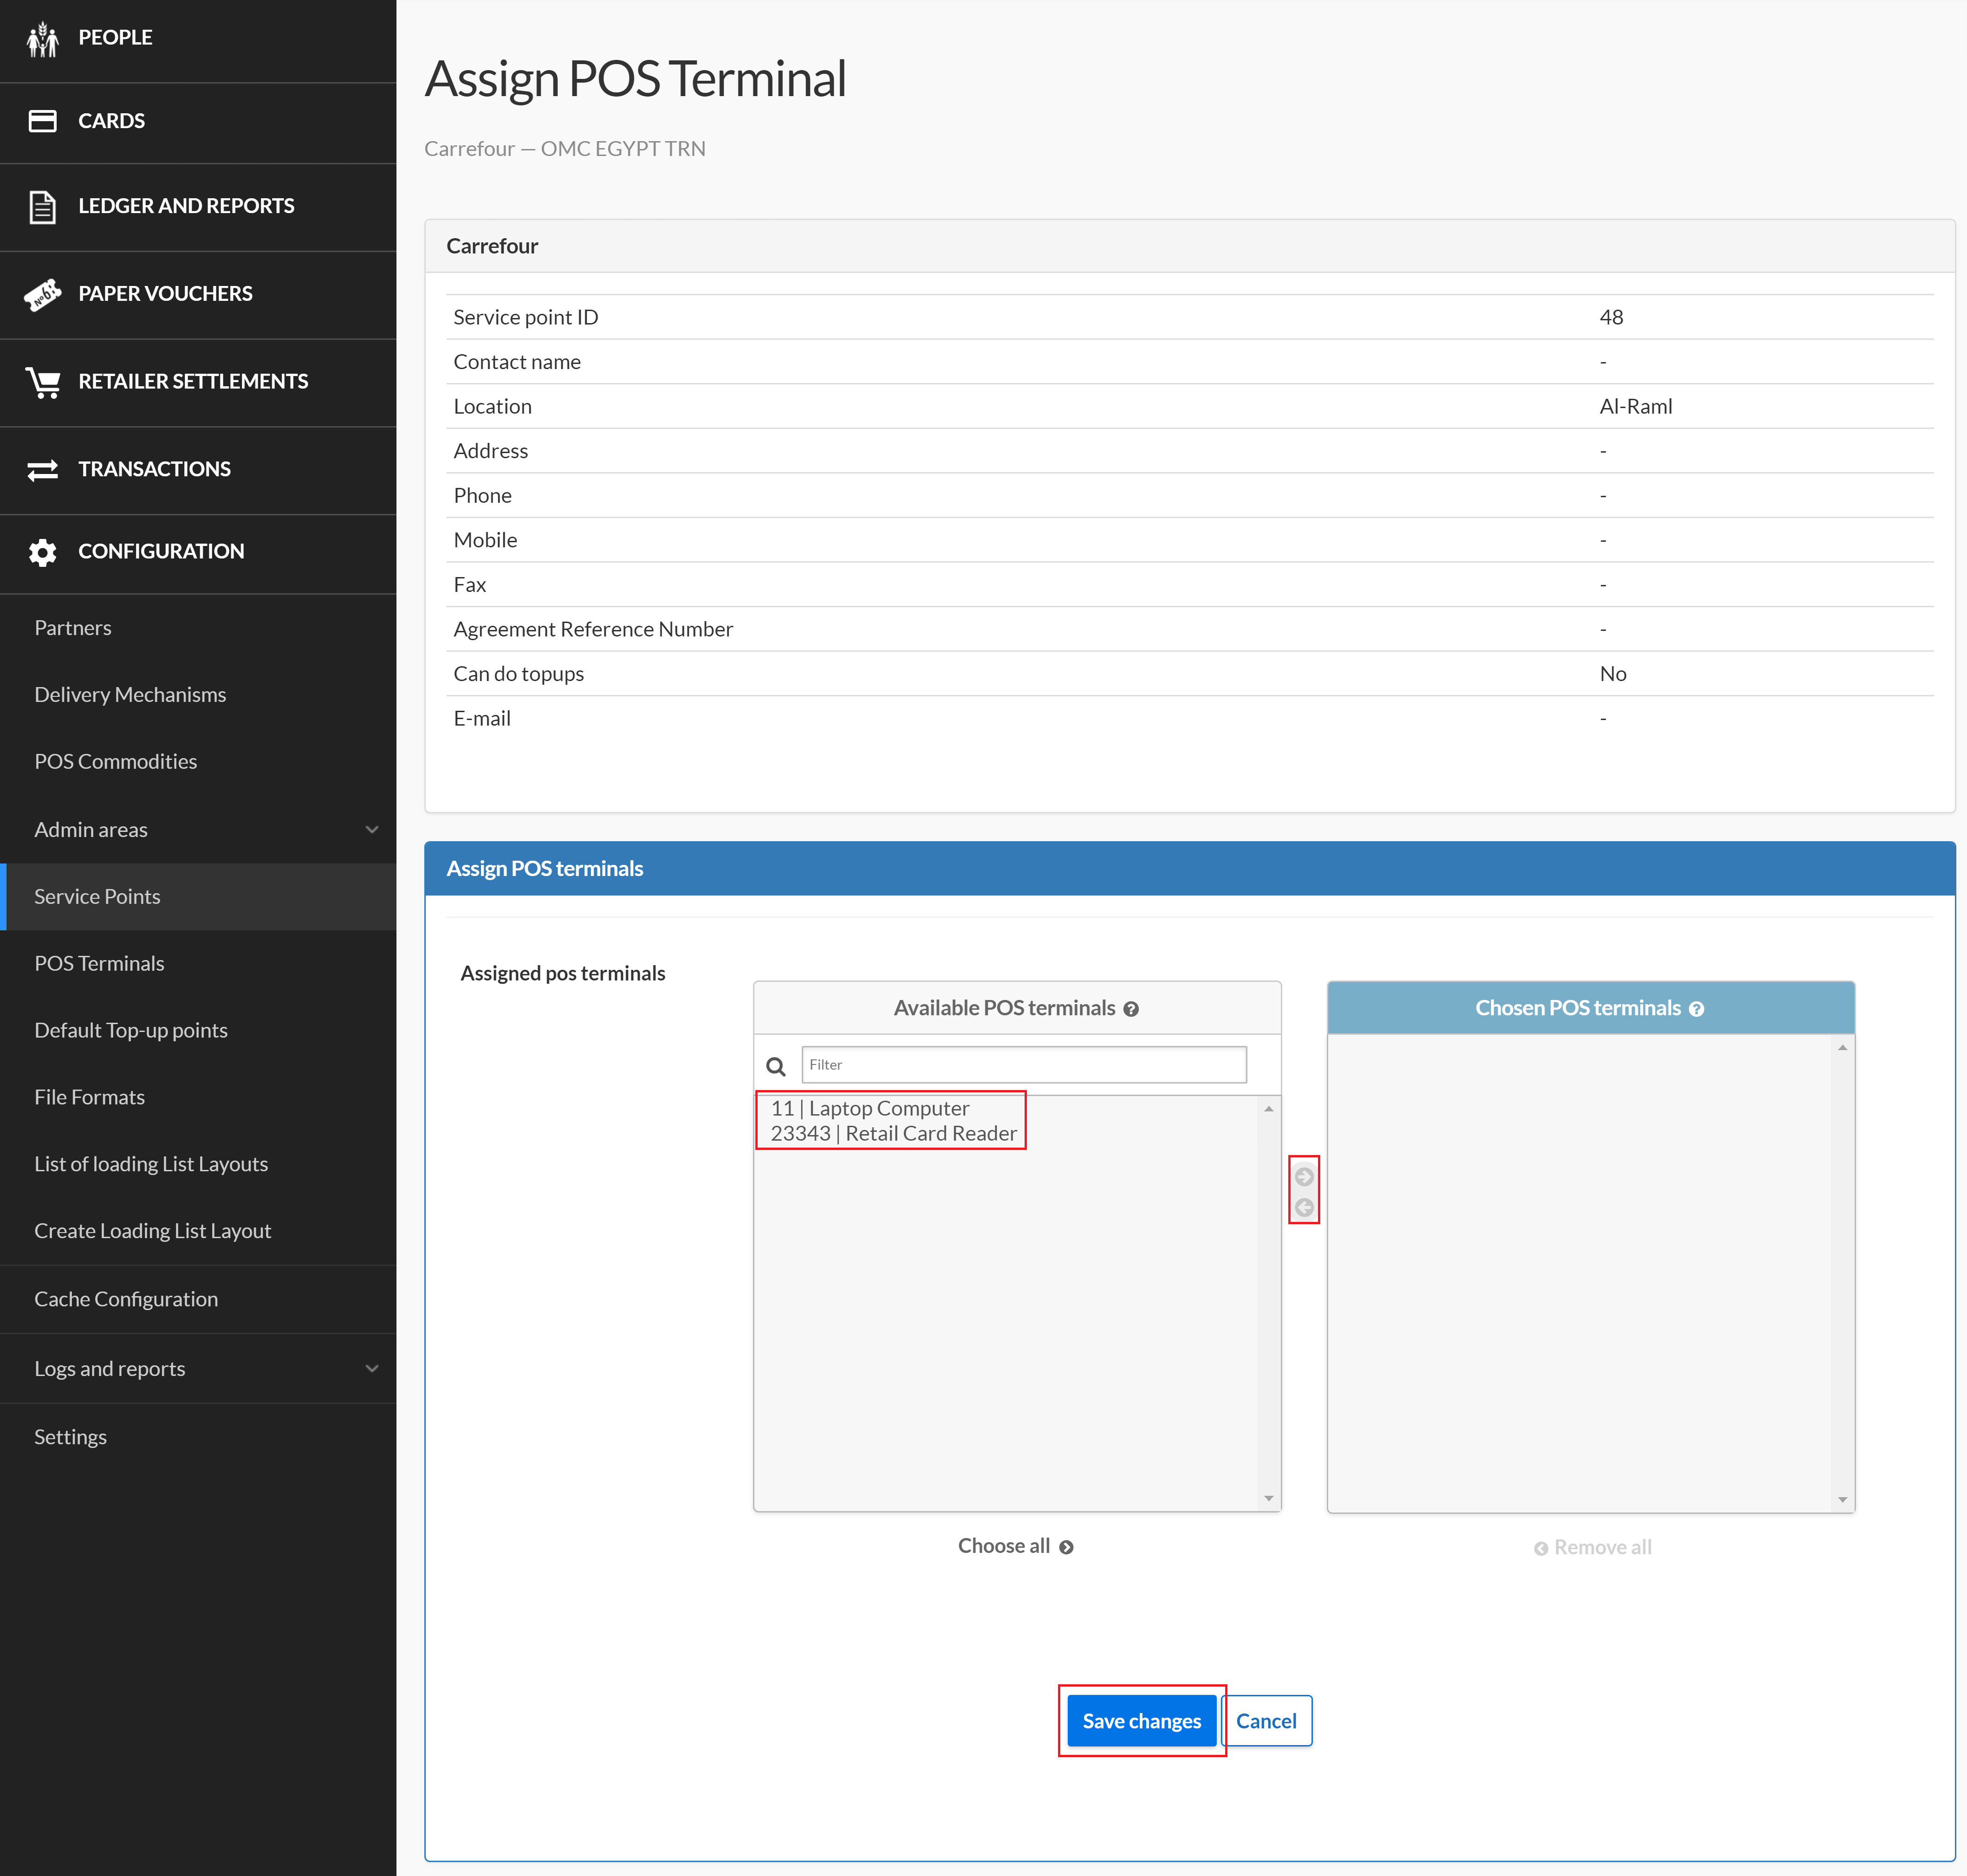
In the Assign POS Terminal page, locate the POS terminals you want to assign in the Available POS terminals panel and double-click to move it into the Chosen POS terminals panel, then click . To move a chosen POS terminal back to the Available POS terminals panel, double-click on the POS terminal in the Chosen POS terminals panel.
-
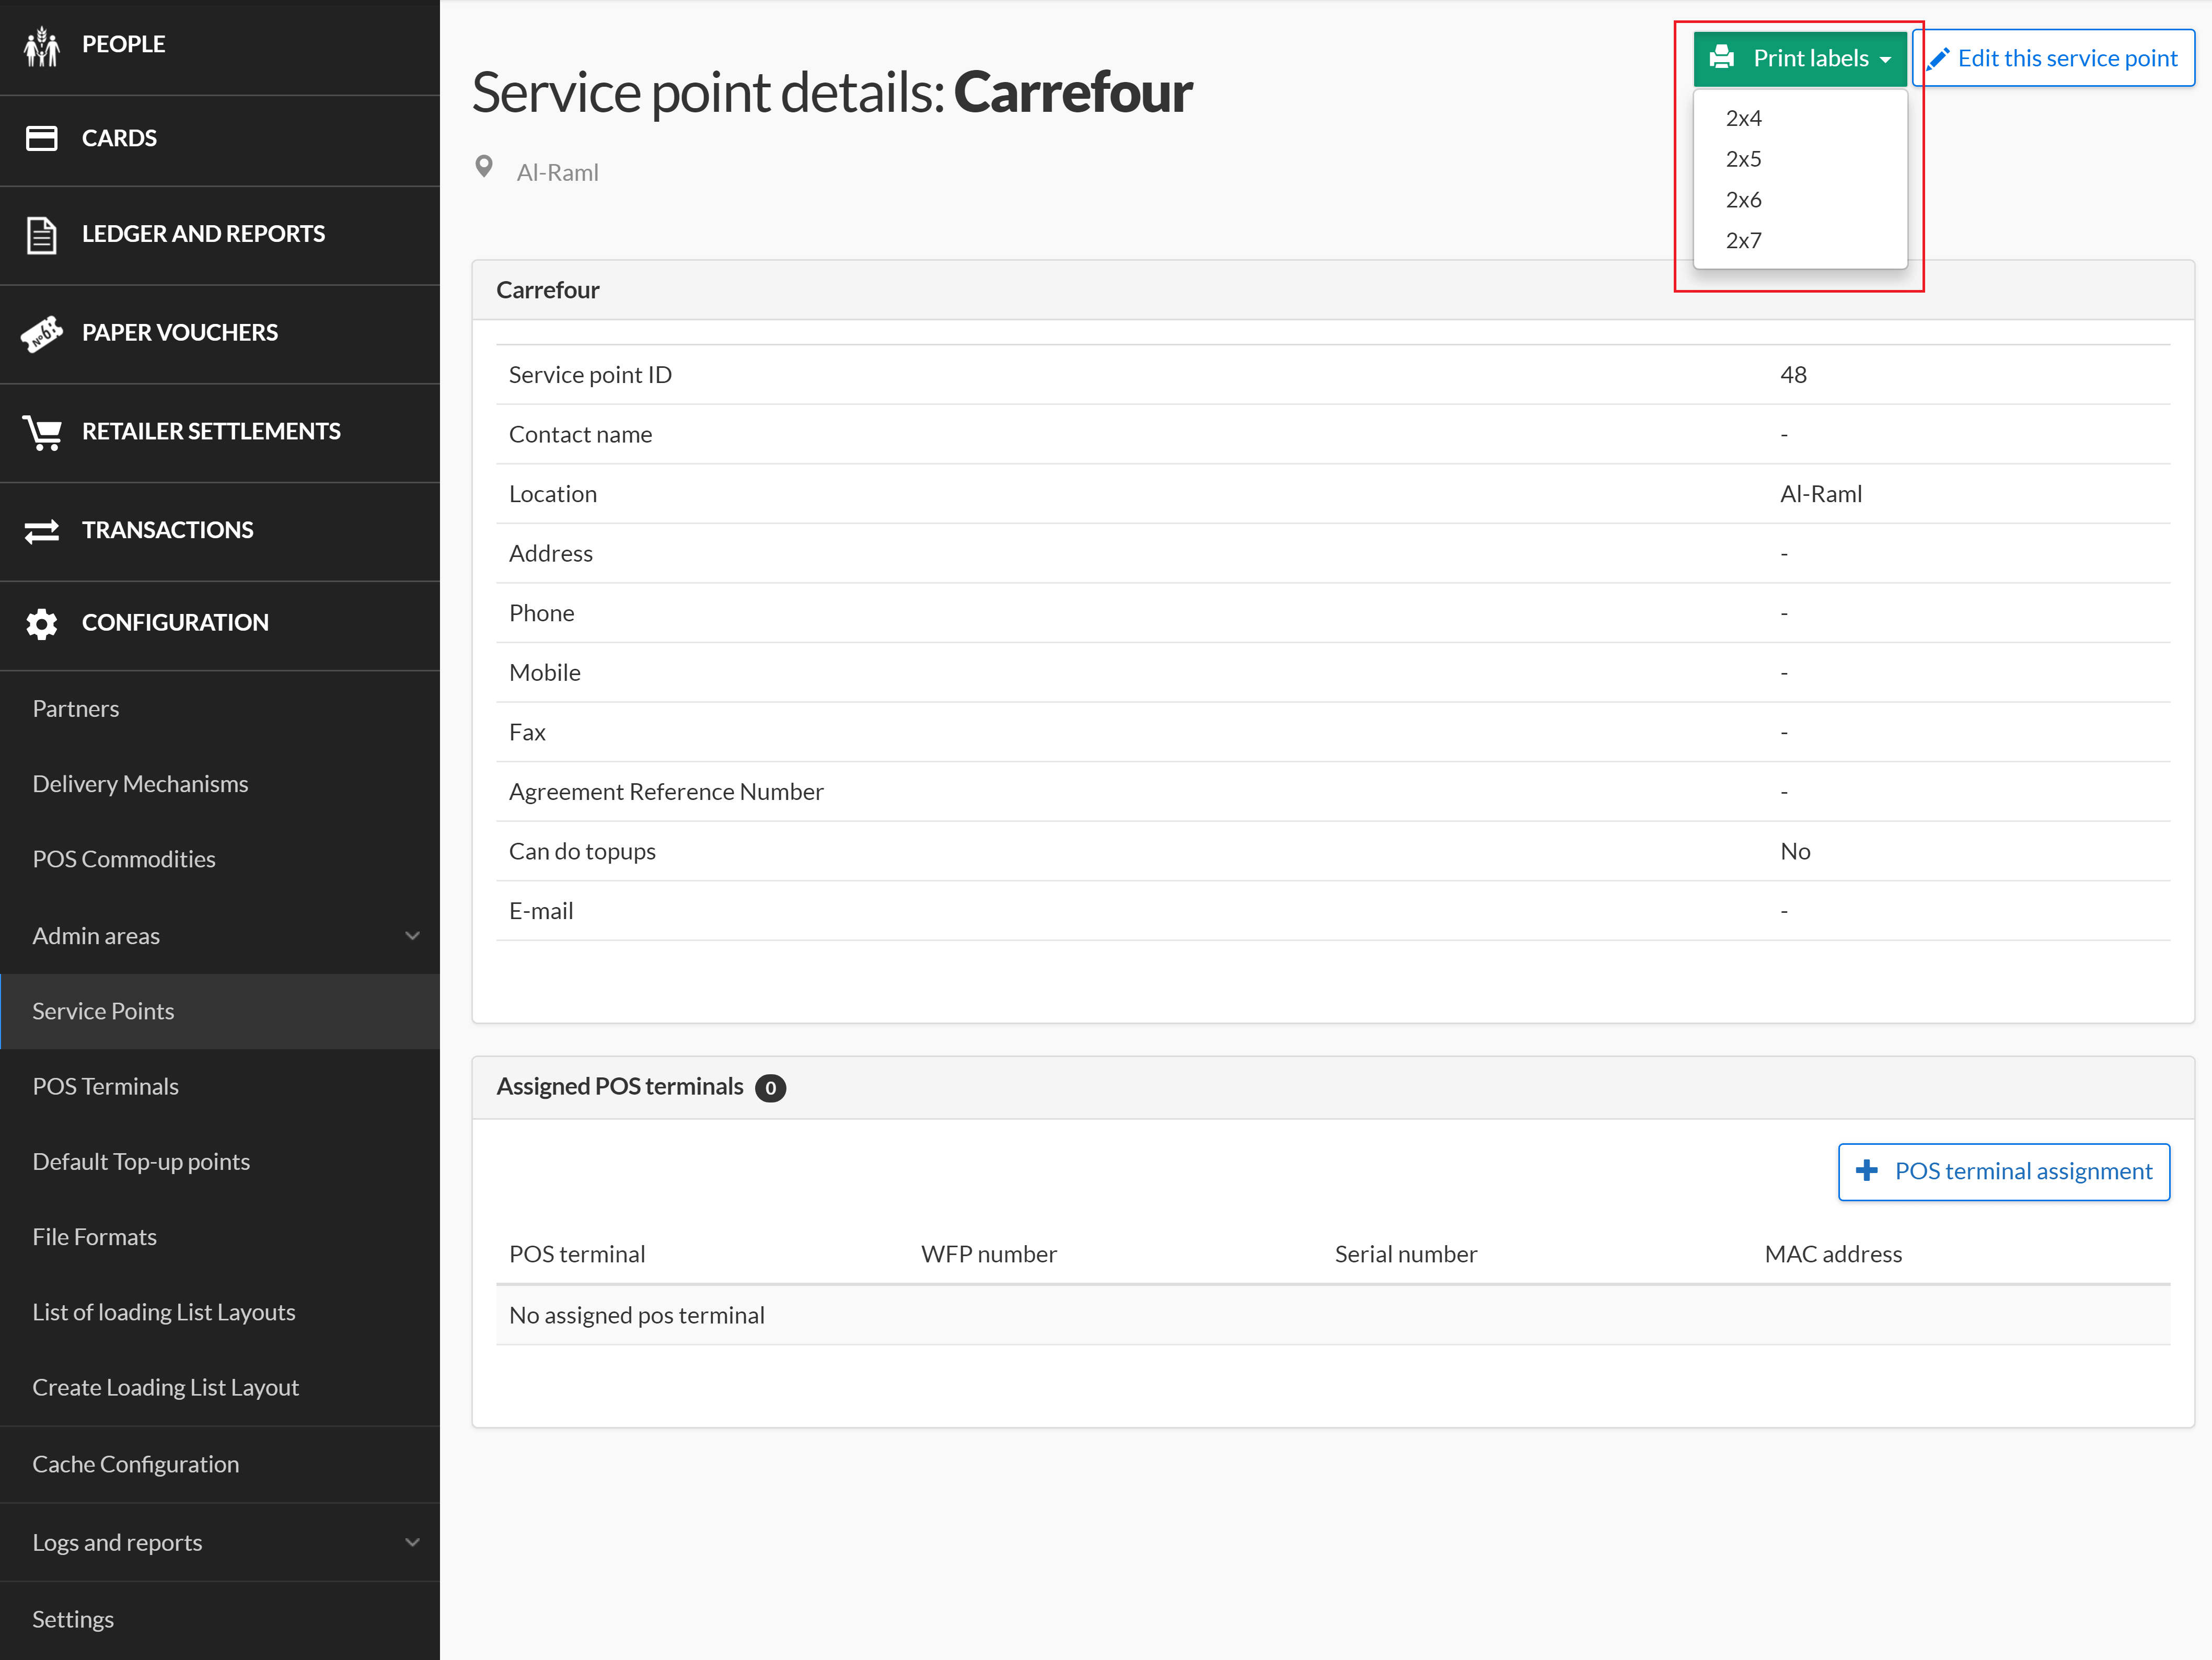
In the Service point details page, click the drop-down menu and select the label count format you want to print.
-
Print the labels in the page which opens and apply to the POS terminal as needed.
