Fingerprint Comparison Page
This section details the Fingerprint Comparison page used when Checking fingerprints. It details how to use the fields and buttons when adjudicating cases. The probe identity's fingerprint is displayed on the left and the database hit's fingerprint is displayed on the right.

- Score: Measures how similar the fingerprints are. The higher the score, the more similar they are.
- Image drop-down menu: Each fingerprint has its own drop down menu that allows you to set how the fingerprint is displayed.
Option Description Image None No image is displayed. Use this to compare the overlays. 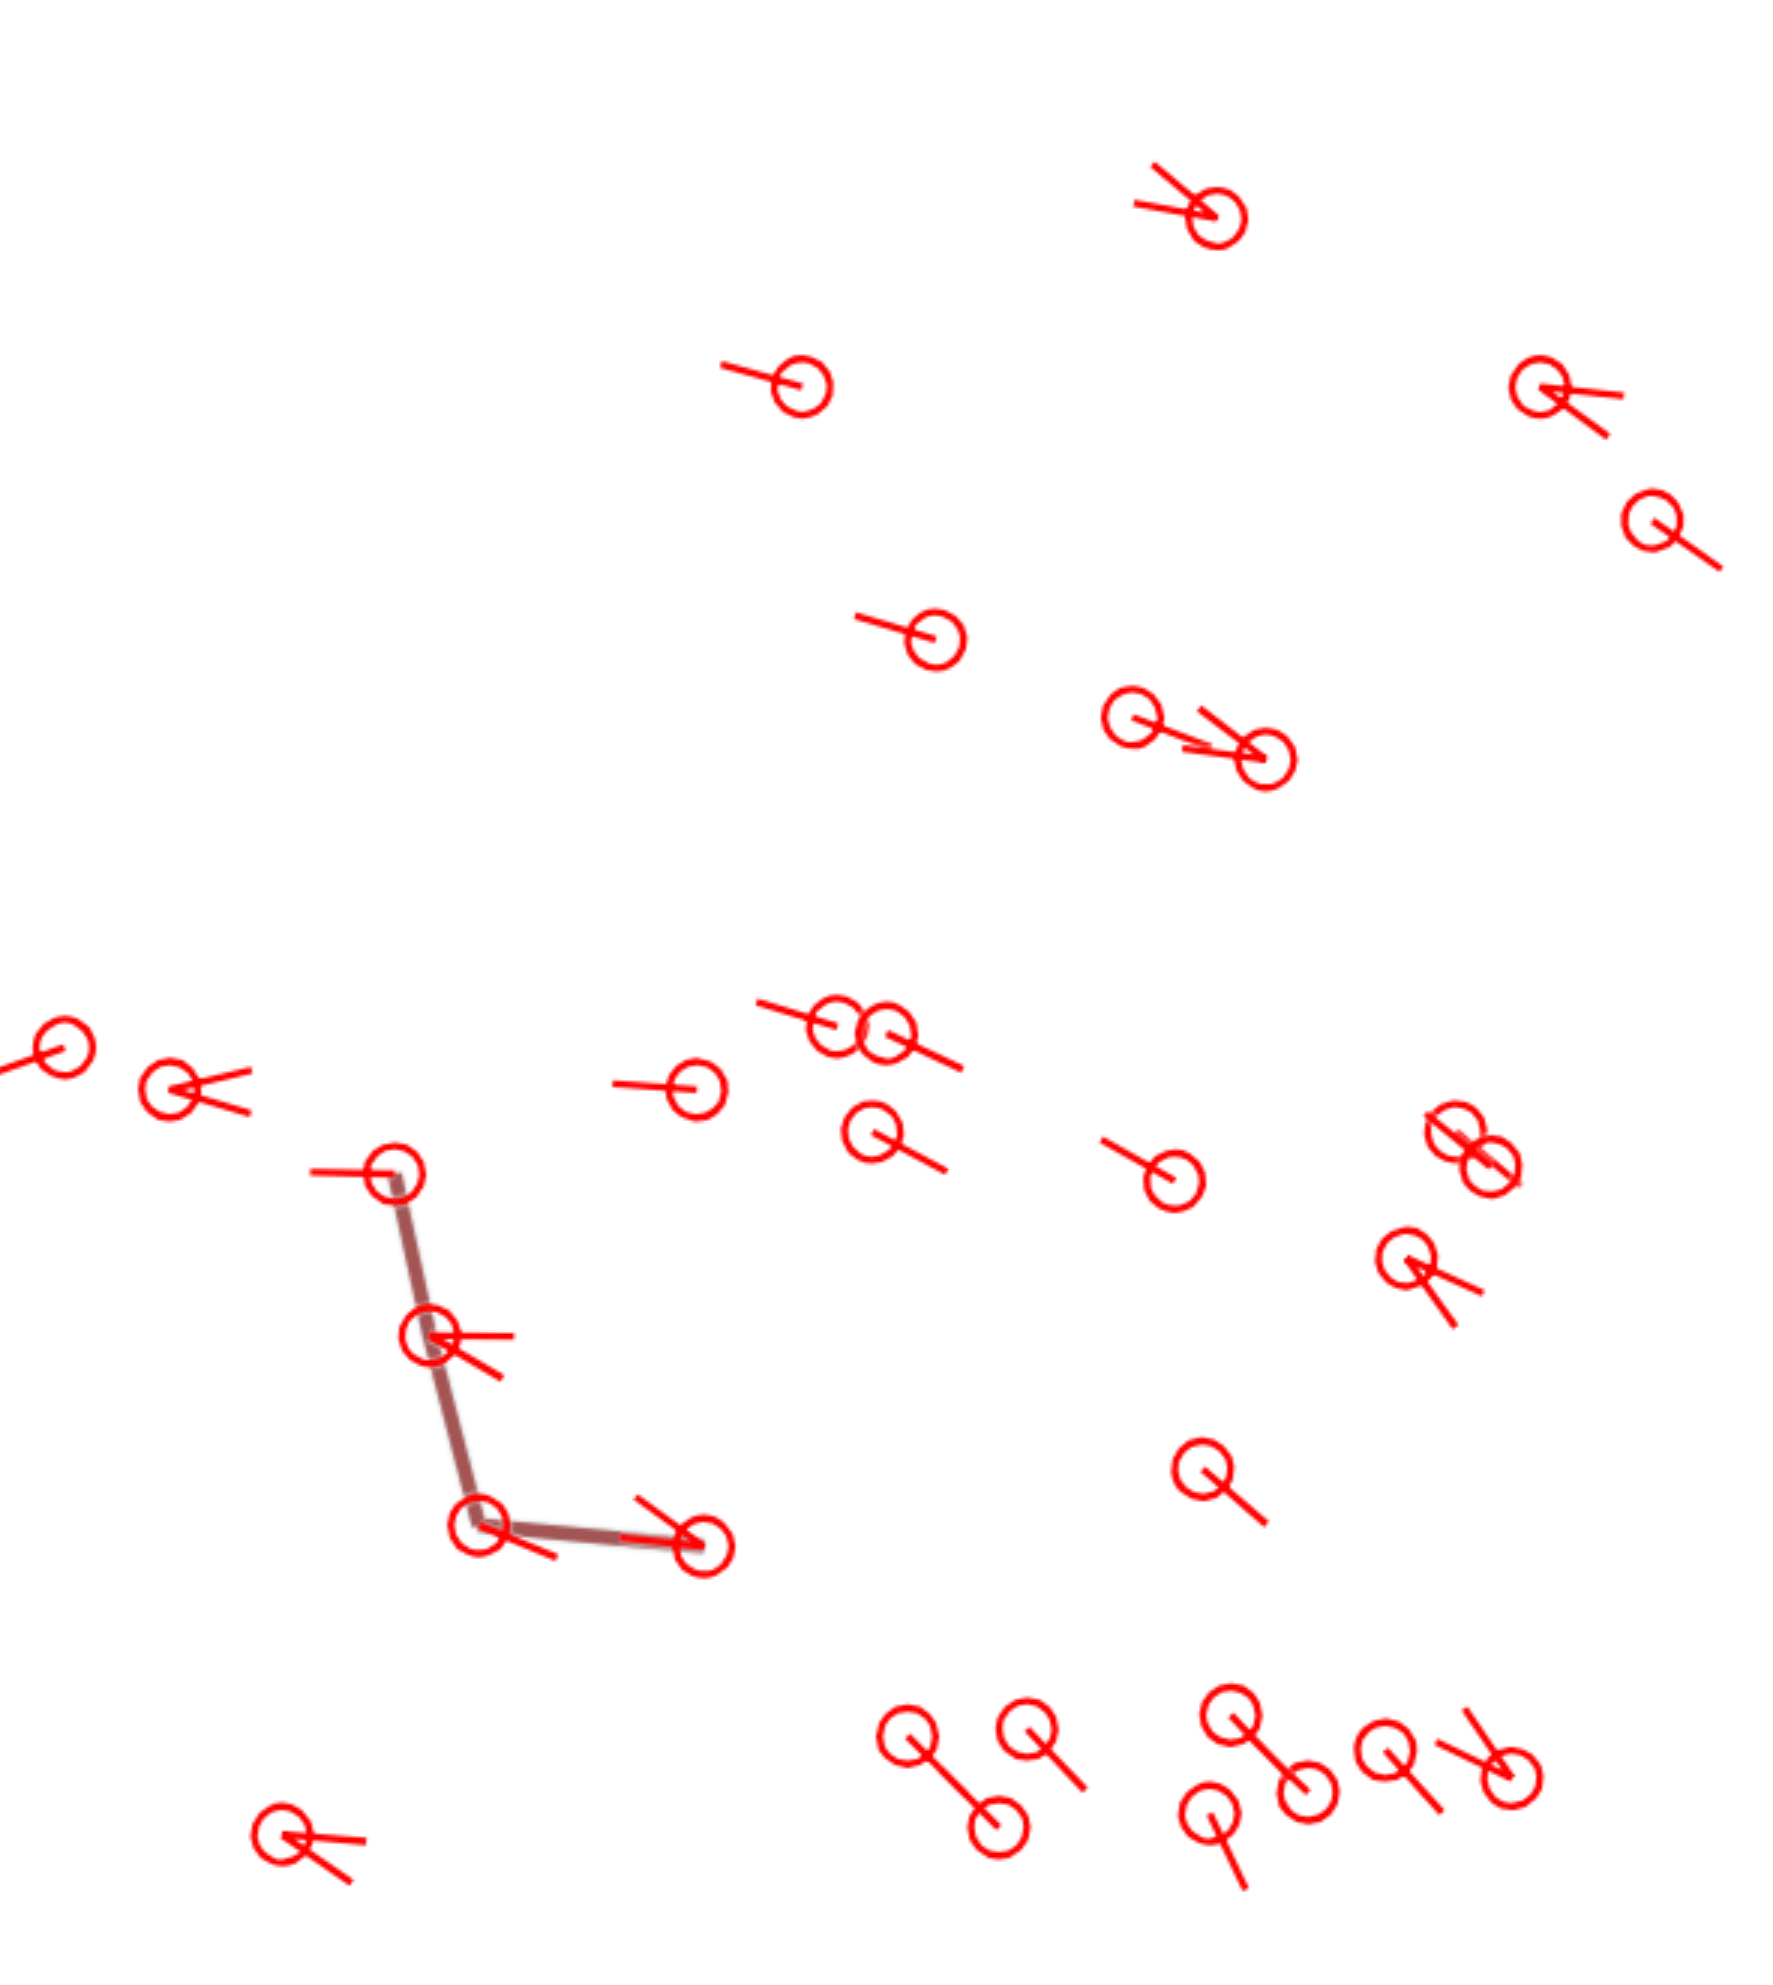
Original The original scan is displayed. This is the default view. This is the most accurate view. 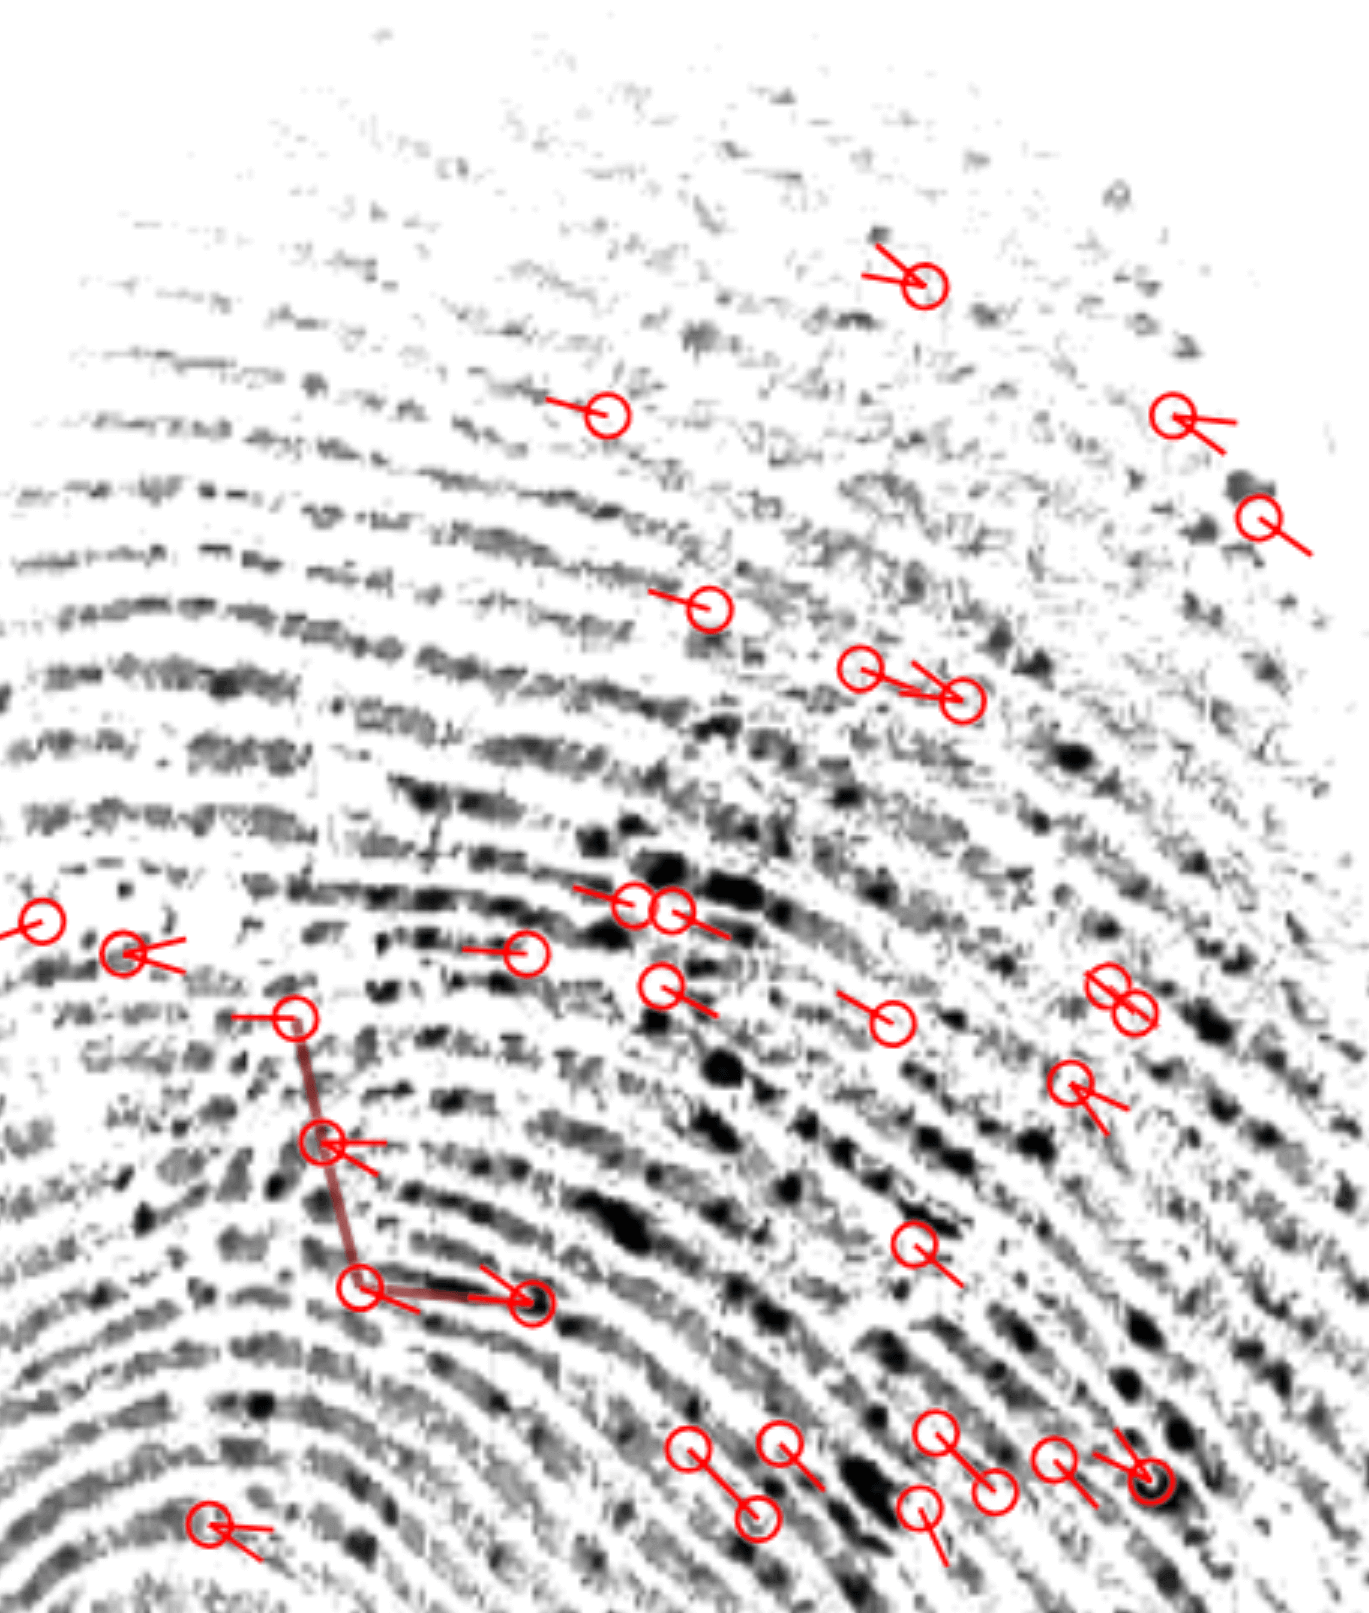
Binarized The original scan is converted into a binarized view. Ridges are displayed as black lines, and the spaces between ridges are displayed as white space. If the original scan is noisy or unclear this can help make it easier to view the fingerprint. 
Skeletonized The original scan is converted into a skeletonized view. The ridges are converted into thin lines. This can make it easier to see certain features. 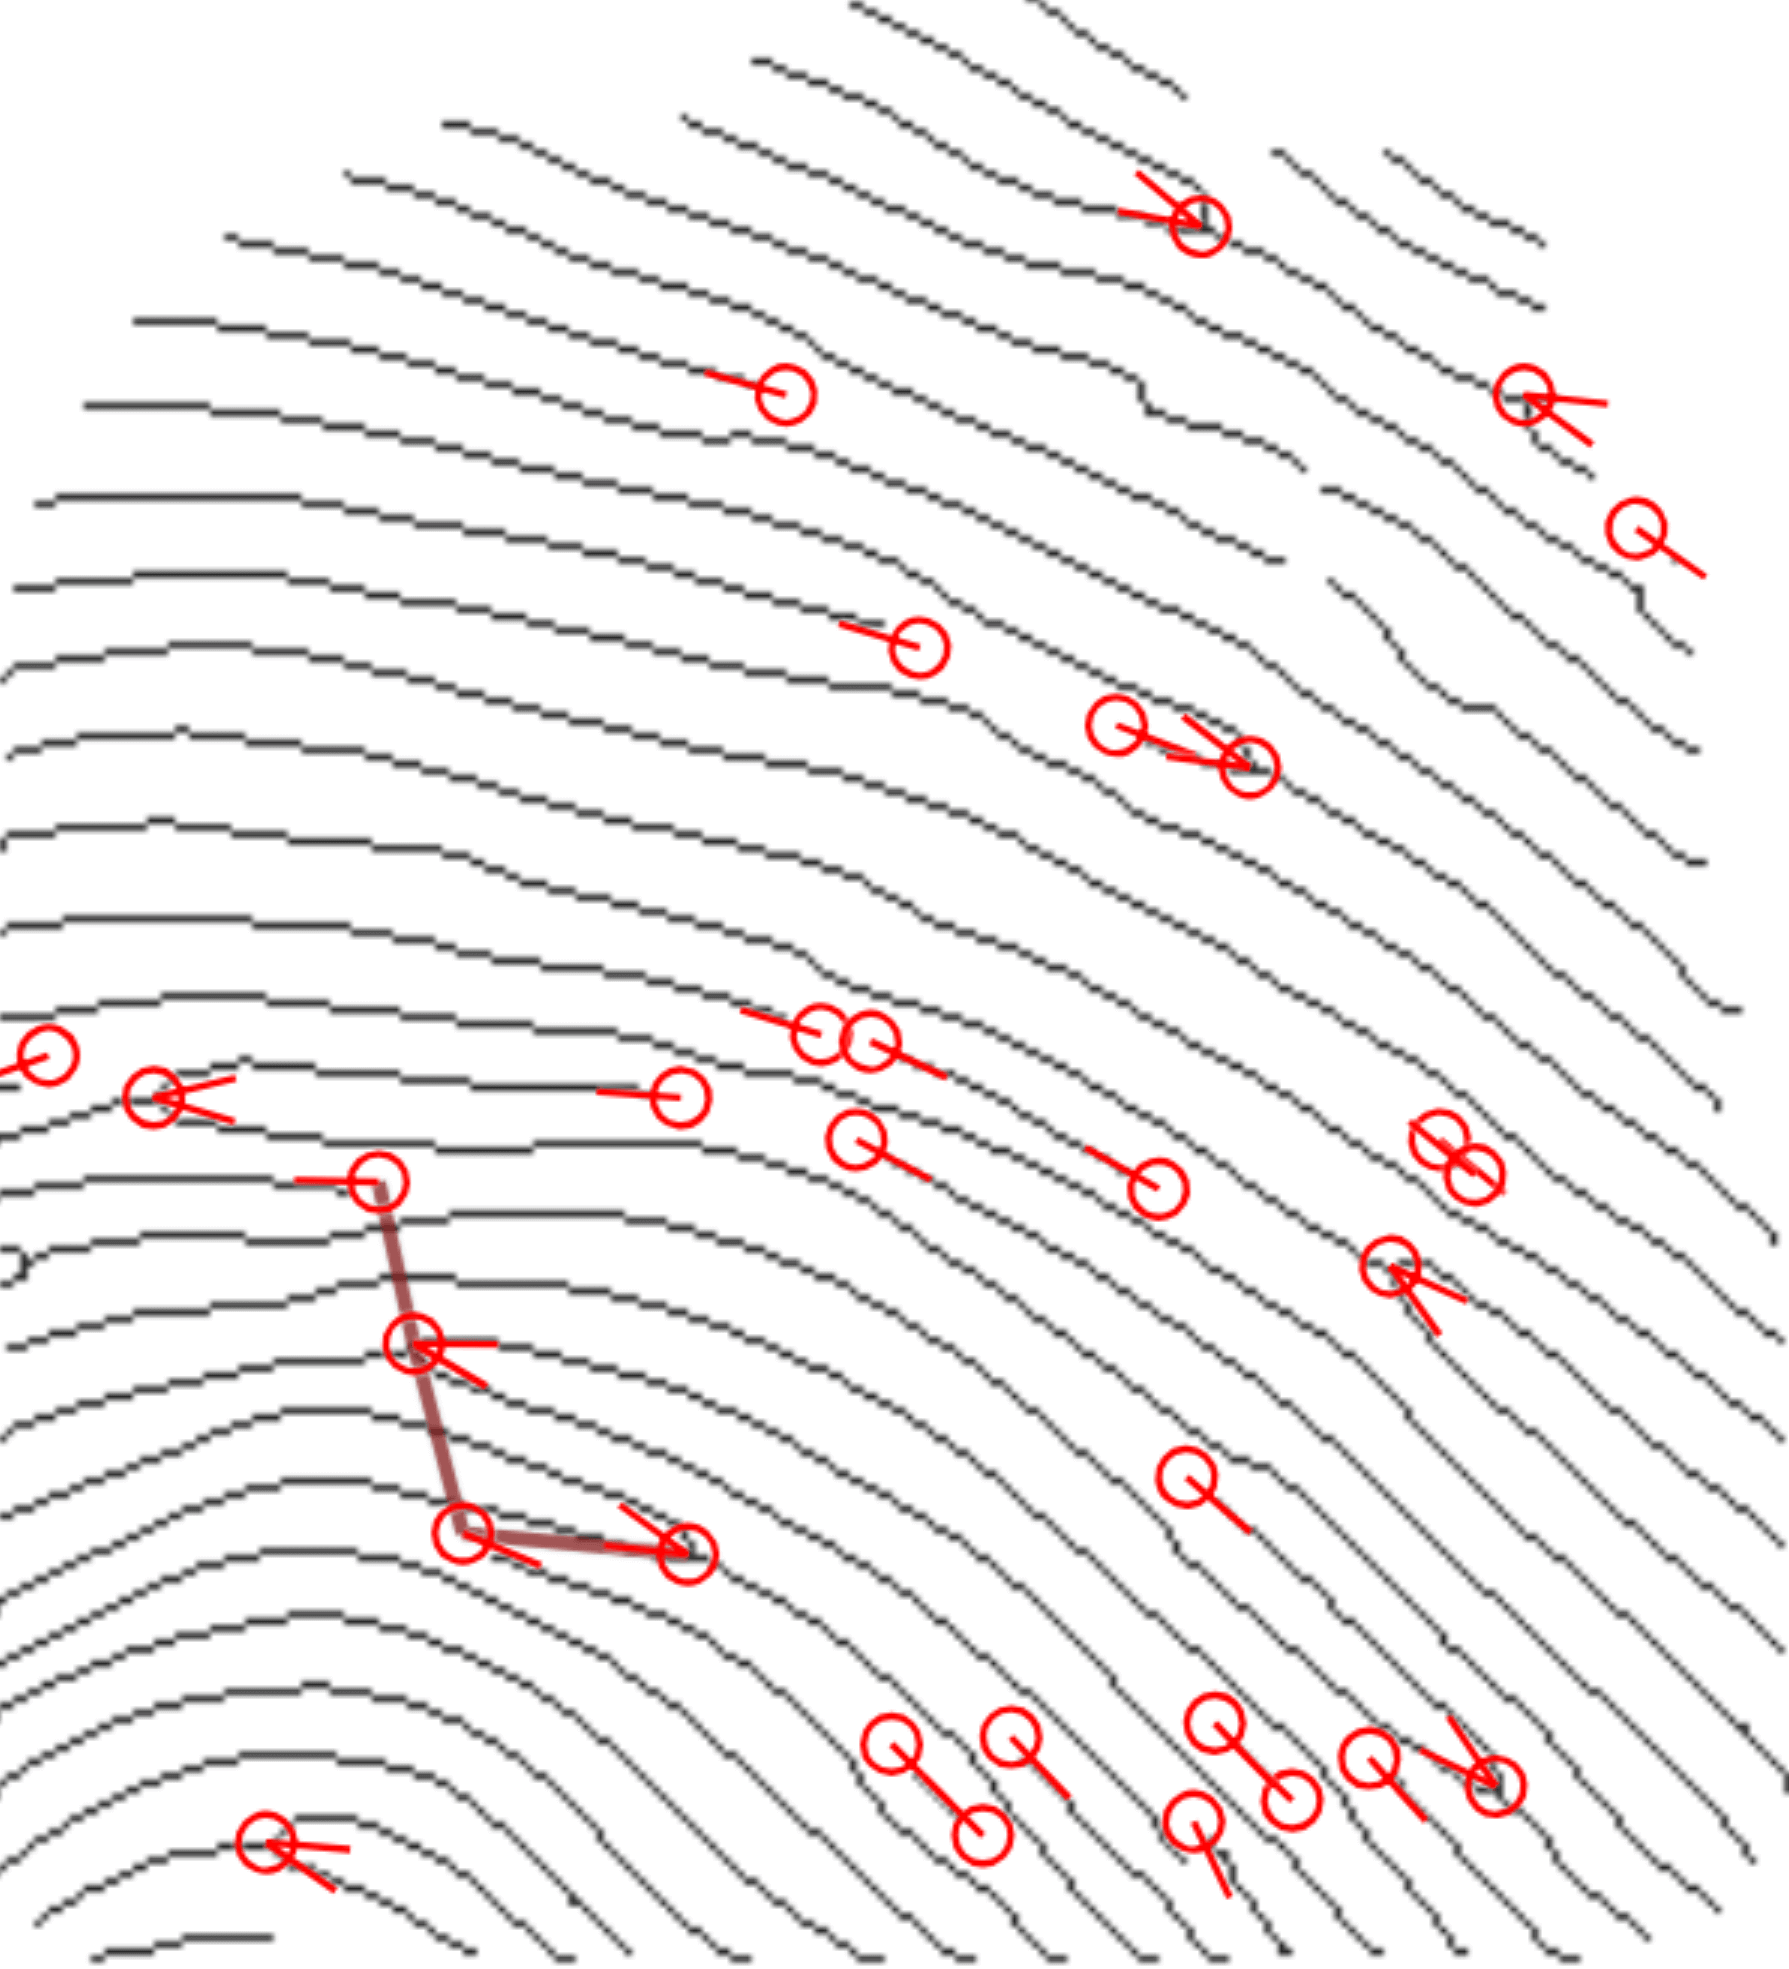
Color You can change the color. This can make it easier to differentiate between the fingerprints when you overlay them. Opacity The sliders allow you to adjust the opacity, brightness, and contrast of the fingerprint images, respectively. The sliders affect the lines of the fingerprint. They do not affect the white space. They can be used to make it easier to see the details and features of the fingerprint. Brightness Contrast - Overlay drop-down menu: Each fingerprint has its own drop down menu to customize the overlay for that fingerprint.
Option Description Draw matching tree Toggle this to show matching trees on the overlay. Matching trees are trees drawn between features that are identical for both fingerprints. Draw features Toggle whether to display all features on the fingerprint. Minutiae Toggle which features to display. Cores Deltas Double cores Color Change the color used for the overlay. - Reset: Click this to reset the position, rotation, and zoom of both fingerprints. It does not affect the settings in the Image drop-down menu and the Overlay drop-down menu.
- Overlap: Click this to overlap the fingerprints. ABIS will align the fingerprints based on the matching trees and features.
- Mouse wheel mode: Set whether you want to use the mouse wheel to control zoom and rotation.
- Mouse wheel mode: Set how fine the mouse wheel control is. Select precision to reduce the amount of rotation or zoom that occurs when you rotate the mouse wheel.
- Zoom mode: Set whether you want to control the zoom for both fingerprints at the same time or separately.
- Drag mode: Set whether you want to drag both fingerprints at the same time or separately.
- Front finger: Select which finger you want to be in the front when you are overlaying them.
- Export: Click this to export the fingerprints as a PNG. The fingerprints will be exported exactly as they appear on screen at the time.
- Show History and Comments: Click this to view the history of the adjudication as well as any comments made on the case.